Understand which chip your board uses and how to get it working on any operating system
If you’ve ever struggled with connecting your ESP32 to your computer, you’ve encountered the crucial component that makes this communication possible: the USB-to-UART bridge chip. This comprehensive guide will help you understand the differences between the various chips used on ESP32 boards and provide complete driver installation instructions for each.
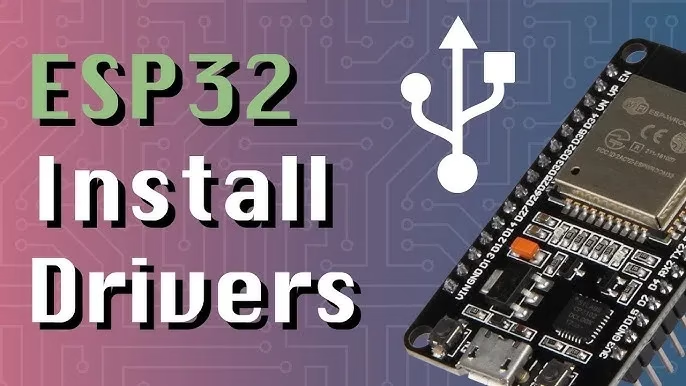
Why USB-to-UART Chips Are Essential for ESP32 Development
The ESP32 microcontroller communicates using serial (UART) protocol, while computers use USB. The USB-to-UART bridge chip translates between these two protocols, enabling three critical functions:
- Firmware Flashing: Uploading compiled code to the ESP32’s flash memory
- Serial Monitoring: Viewing debug messages and program output in real-time
- Data Transfer: Exchanging data between ESP32 applications and computer software
Without this bridge chip, you would need an external serial adapter to program your ESP32, adding extra cost and complexity to your development workflow.
Comparing Popular USB-to-UART Chips on ESP32 Boards
ESP32 board manufacturers select different USB-to-UART chips based on cost, performance, and availability. Understanding these differences will help you choose the right board for your needs and troubleshoot connection issues more effectively.
| Chip Model |
Key Characteristics |
Typical Board Examples |
Best For |
| CP2102 / CP2104 |
Reliable, excellent Windows compatibility, widely available |
Many NodeMCU-32S, SparkFun ESP32 Thing |
General purpose development, Windows users |
| CH340 / CH341 |
Extremely cost-effective, common on budget boards, may require driver work on newer OSes |
Low-cost boards from AliExpress/Amazon, WEMOS LOLIN boards |
Hobbyists on a budget, non-critical projects |
| FT232RL |
Premium performance, highest stability, excellent compatibility, full hardware flow control |
Adafruit boards, professional development tools |
Professional development, critical applications |
| CP2102N |
Newer version of CP2102, improved performance, Espressif’s current preferred choice |
Espressif’s official ESP32-DevKitC, ESP32-WROVER-KIT |
Reliable development, commercial products |
| Built-in USB-OTG |
No external chip needed, uses ESP32-S2/S3’s native USB peripheral |
Any board based on ESP32-S2 or ESP32-S3 |
Advanced projects, reduced BOM cost |
Selection Tip: For professional development, FT232RL and CP2102N offer the best stability. For hobby projects on a budget, CH340 is perfectly adequate. Most users will be well served by CP2102-based boards.
Complete Driver Installation Guide
Important: Always download drivers from the official manufacturer websites. Third-party sources often host outdated, incompatible, or even malicious drivers.
Windows Driver Installation
For CP210x (CP2102, CP2104, CP2102N):
- Download the
CP210x Universal Windows Driver from the Silicon Labs website
- Run the installer executable
- Connect your ESP32 board
- Verify installation in Device Manager under
Ports (COM & LPT)
For CH340/CH341:
- Download the driver from WCH.cn
- Run the installer (may require administrator privileges)
- Restart your computer if prompted
For FT232RL:
- Download the latest
CDM Drivers from FTDI’s website
- Run the installer and follow the prompts
macOS Driver Installation
For CP210x:
- Option 1 (Recommended): Install via Homebrew:
brew install --cask silicon-labs-vcp-driver
- Option 2: Download from Silicon Labs and manually install
For CH340/CH341:
- Download macOS driver from WCH.cn
- Open the downloaded package and follow installation instructions
- Approve the driver in
System Preferences > Security & Privacy if required
macOS Security Note: On macOS Catalina (10.15) and later, you must manually allow kernel extensions in System Preferences > Security & Privacy after installation.
Linux Driver Installation
Linux kernels (version 2.6+) typically include built-in drivers for CP210x and FTDI chips, making installation straightforward:
- Connect your ESP32 board to a USB port
- Check if the device is recognized with
ls /dev/ttyUSB* or ls /dev/ttyACM*
- Add your user to the
dialout group for serial port access:
sudo usermod -a -G dialout $USER
Important: You must log out and log back in for this change to take effect.
For CH340 chips on some distributions, you might need to install additional packages:
# For Debian/Ubuntu-based systems
sudo apt install ch340-common
Troubleshooting Common Connection Issues
Even with correct drivers, you might encounter connection problems. Here are solutions to common issues:
- Board not recognized: Try a different USB cable (many cables are power-only), try different USB ports, restart your computer.
- Driver conflicts: Uninstall previous drivers completely before installing new ones.
- Permission errors (Linux/macOS): Ensure your user is in the correct group and you’ve logged out/in after adding.
- Port busy errors: Close other programs that might be using the serial port (Serial Monitor, terminal, etc.).
- Upload failures: Put the ESP32 into bootloader mode manually by holding the BOOT button while clicking RESET, then releasing BOOT.
Conclusion
Understanding the differences between USB-to-UART bridge chips and knowing how to install their drivers is essential for every ESP32 developer. While all major chips perform the same basic function, their stability, compatibility, and ease of use vary significantly.
For most users, boards with CP2102N or CP2104 chips offer the best balance of reliability and affordability. The integrated USB capability of ESP32-S2 and ESP32-S3 chips represents the future, eliminating the need for external bridge chips entirely.
With the information in this guide, you should be able to identify which chip your board uses, install the appropriate drivers, and troubleshoot any connection issues that arise.
======================================
Since 2016,
ESP32S.com has grown to become a complete ecosystem partner for your IoT journey. Based in Shenzhen, a global hub for electronics innovation, we have helped hundreds of developers and businesses bring their
ESP32-based ideas to life. Our team is dedicated to providing exceptional support and innovative solutions to help you achieve your IoT goals.
At
ESP32S.com, we master the intricacies of developing an
ESP32-based product, which involves multiple stages, from concept to market launch. That’s why we now offer comprehensive solutions covering the entire product lifecycle for
ESP32-based devices. Whether you need help with PCB design, prototyping, production, or even marketing and fulfillment, we have you covered.
Ready to take your IoT project to the next level?
Contact ESP32S.com today to learn more about our comprehensive solutions for
ESP32-based devices. Let us be your trusted partner in bringing your innovative ideas to life.
Contact us now to get started.
