Are you looking for a reliable, high-bandwidth, and easy-to-implement wireless communication solution for your IoT projects? Compared to complex Wi-Fi setup and the BLE protocol stack, the built-in Bluetooth Classic functionality of the ESP32 offers a reliable alternative that’s as simple as using serial communication.
This comprehensive guide will take you from zero to proficient, teaching you how to leverage the powerful Bluetooth Classic feature of the ESP32 using the Arduino IDE for real-world applications. We’ll not only cover basic data exchange but also build a complete bi-directional communication system: controlling an LED on the ESP32 from your smartphone and receiving real-time sensor data from the ESP32 on your phone.
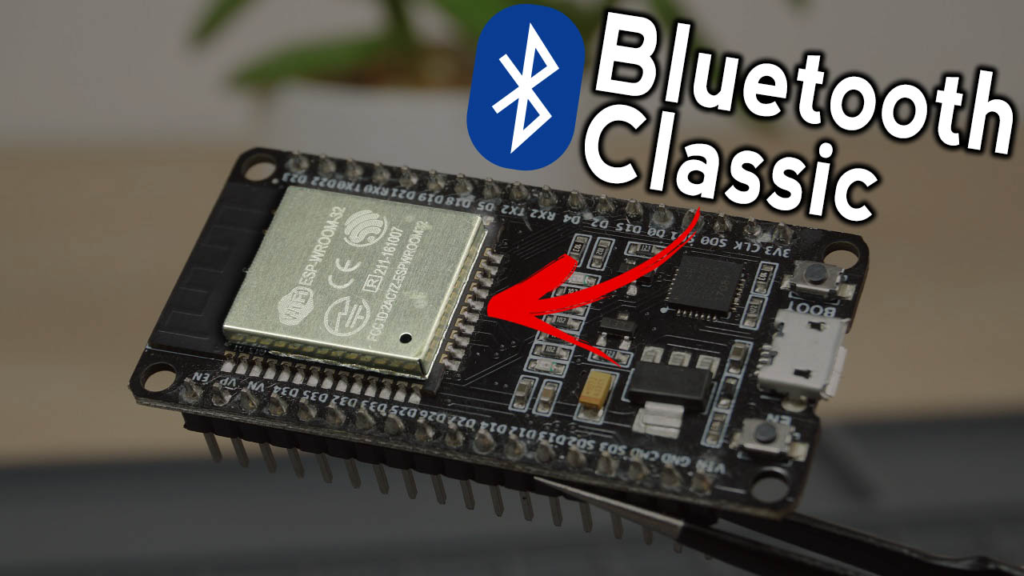
Part 1: Understanding ESP32 Bluetooth Classic — Why Choose It?
The ESP32 is a powerful microcontroller, and one of its key features is integrated dual-mode Bluetooth. Understanding the difference between the two modes is the first step to making the right choice.
-
Bluetooth Classic: Ideal for continuous, higher data rate communication. It’s commonly used for audio streaming (e.g., Bluetooth speakers), file transfer, and traditional serial data communication (SPP). Its development model is extremely simple, almost zero-learning-curve for users familiar with Arduino Serial, essentially acting as a wireless serial cable.
-
Bluetooth Low Energy (BLE): Optimized for intermittent, small data packet transmission with very low power consumption. Often used in beacons, health devices, etc. Its development involves Services and Characteristics, which is more complex.
For projects that require simple command control, continuous data logging transmission, or where you are migrating from modules like HC-05/06, Bluetooth Classic is the most straightforward and efficient choice.
Core Advantages for Developers:
-
Simple Protocol: Uses the Serial Port Profile (SPP), compatible with most Bluetooth serial terminal apps.
-
High Compatibility: Universally supported by Android, Windows, Linux, and other systems.
-
Familiar API: In Arduino IDE, it uses the BluetoothSerial library, and its functions (read(), write(), print(), available()) are almost identical to the standard Serial object, making it very easy to learn.
Part 2: Getting Started: Hardware, Software, and Basic Communication
2.1 Prerequisites
2.2 First Test: Serial Bridge
The Arduino IDE for ESP32 comes with excellent examples. Let’s run the simplest one to verify your environment.
-
Open Arduino IDE, go to File -> Examples -> BluetoothSerial -> SerialToSerialBT.
-
An example code will open. This code creates a bidirectional bridge between the hardware serial port (UART) and Bluetooth.
-
Upload the code to your ESP32. Ensure you’ve selected the correct board and port under the Tools menu.
-
Open the Serial Monitor (Tools -> Serial Monitor), set the baud rate to 115200. Press the EN/RST button on the ESP32.
-
You should see the message: “The device started, now you can pair it with bluetooth!”
Pairing and Connection:
-
On your Android phone, open Settings -> Bluetooth, search for new devices. You should find a device named “ESP32test” (the default name in the code). Pair with it.
-
Open the “Serial Bluetooth Terminal” app. Click the connect icon (usually a Bluetooth symbol) and select “ESP32test” from the list.
-
Test Communication:
Congratulations! You have established a basic wireless serial link.
Part 3: Building a Practical Bi-Directional Control & Monitoring Project
Now, let’s build a more practical application. We will create a system where:
-
The ESP32 reads temperature from a DS18B20 sensor and sends it to the smartphone every 10 seconds.
-
The smartphone can send led_on and led_off commands to control an LED connected to the ESP32.
3.1 Circuit Connection
*Note: The DS18B20 is a 1-Wire digital temperature sensor. A 4.7kΩ pull-up resistor is recommended between its Data pin and VCC, though many modules already include it.*
3.2 Installing Required Libraries
In Arduino IDE, open Tools -> Manage Libraries... and install:
3.3 The Complete Arduino Sketch
Below is the well-commented code that implements all the functionalities. You can copy and upload it after installing the libraries and setting up the circuit.
#include "BluetoothSerial.h"
#include <OneWire.h>
#include <DallasTemperature.h>
#if !defined(CONFIG_BT_ENABLED) || !defined(CONFIG_BLUEDROID_ENABLED)
#error Bluetooth is not enabled! Please run 'make menuconfig' to enable it
#endif
BluetoothSerial SerialBT;
const int ledPin = 25;
const int oneWireBus = 32;
OneWire oneWire(oneWireBus);
DallasTemperature sensors(&oneWire);
String incomingMessage = "";
float tempC, tempF;
unsigned long previousMillis = 0;
const long interval = 10000;
void setup() {
pinMode(ledPin, OUTPUT);
digitalWrite(ledPin, LOW);
Serial.begin(115200);
sensors.begin();
SerialBT.begin("ESP32_Climate_Controller");
Serial.println("Bluetooth device is ready for pairing. Name: 'ESP32_Climate_Controller'");
}
void loop() {
unsigned long currentMillis = millis();
if (currentMillis - previousMillis >= interval) {
previousMillis = currentMillis;
sensors.requestTemperatures();
tempC = sensors.getTempCByIndex(0);
tempF = sensors.getTempFByIndex(0);
String dataString = "Temperature: " + String(tempC) + "°C | " + String(tempF) + "°F";
SerialBT.println(dataString);
Serial.println("Sent: " + dataString);
}
if (SerialBT.available()) {
char incomingChar = SerialBT.read();
Serial.write(incomingChar);
if (incomingChar != '\n') {
incomingMessage += incomingChar;
} else {
incomingMessage.trim();
Serial.print("Command Received: '");
Serial.print(incomingMessage);
Serial.println("'");
if (incomingMessage == "led_on") {
digitalWrite(ledPin, HIGH);
SerialBT.println("LED Status: ON");
Serial.println("LED turned ON.");
} else if (incomingMessage == "led_off") {
digitalWrite(ledPin, LOW);
SerialBT.println("LED Status: OFF");
Serial.println("LED turned OFF.");
} else {
SerialBT.println("ERROR: Unknown command. Use 'led_on' or 'led_off'.");
Serial.println("Unknown command received.");
}
incomingMessage = "";
}
}
delay(20);
}
3.4 How It Works & Testing
-
Upload the Code: After wiring, upload the sketch to your ESP32.
-
Monitor Serial: Open the Serial Monitor (115200 baud). You’ll see the ready message.
-
Connect Phone: On your phone’s Bluetooth settings, forget the old “ESP32test” and pair with the new “ESP32_Climate_Controller”. Connect via the Serial Bluetooth Terminal app.
-
Automatic Data Reception: You should see temperature readings appear in the terminal app every 10 seconds.
-
Send Control Commands: In the app’s text input field, type led_on and send. The LED on GPIO 25 should light up, and you’ll receive a “LED Status: ON” confirmation on the phone. Sending led_off will turn it off.
Part 4: Expanding Your Project & Advanced Considerations
You’ve built a fundamental framework. Here’s how to extend it and tackle common challenges.
4.1 Project Expansion Ideas
-
Control Multiple Outputs: Add more LEDs, relays, or servos. Use commands like relay1_on, servo_90.
-
Send More Sensor Data: Integrate a DHT22 (humidity), BMP180 (pressure), or motion sensor (PIR). Format and send all data as a JSON string for easy parsing on a phone app (e.g., {"temp":23.5, "humidity":65}).
-
Create a Simple Chatbot: Program the ESP32 to respond to specific questions (e.g., “temp?” -> it sends temperature; “status?” -> it sends GPIO states).
-
Log Data to Phone: Let the phone app log all received sensor data to a file for long-term analysis.
4.2 Troubleshooting Common Issues
4.3 Bluetooth Classic vs. BLE: When to Choose What?
-
Choose Bluetooth Classic if: You need continuous data streaming, are sending larger packets (e.g., files, images for displays), prioritize development simplicity, or need compatibility with traditional serial protocols.
-
Choose BLE if: Your project is battery-powered and needs to run for months, only needs to send tiny bursts of data occasionally (like a sensor reading every minute), or needs to interact with modern smartphones in a standardized, low-power way (like iBeacon).
Conclusion
You have now successfully harnessed the power of ESP32‘s Bluetooth Classic. You’ve moved from a simple serial bridge to a practical, bi-directional control and monitoring system. The key takeaway is that BluetoothSerial makes wireless communication as intuitive as writing to a serial port.
The framework provided here is a springboard. By integrating different sensors and actuators, and processing commands creatively, you can build anything from a wireless weather station to a smart home controller. Remember to explore the BluetoothSerial library documentation for advanced features like checking connection status or setting a PIN code.
Next Steps: Challenge yourself to modify the code to control a servo motor or send data from multiple sensors. To dive deeper into the ESP32‘s other wireless capability, consider exploring our tutorial on ESP32 Wi-Fi as a Web Server for controlling devices over your local network through a browser.
Contact Us
