Why ESP-NOW is a Game-Changer for DIY Electronics and IoT
In the world of microcontroller communication, you’re often forced to choose: the long range and internet connectivity of Wi-Fi, or the low-power simplicity of Bluetooth. What if you need device-to-device communication that is fast, low-latency, and doesn’t require a Wi-Fi router or complex pairing? Enter ESP-NOW.
Developed by Espressif, ESP-NOW is a connectionless, peer-to-peer wireless protocol that allows multiple ESP32 (and ESP8266) boards to talk directly to each other. After years of deploying ESP-NOW networks for remote sensor grids, smart agriculture monitors, and custom home automation systems, I can attest: it’s the most reliable and straightforward way to create robust, direct wireless links between microcontrollers.
This guide goes far beyond basic “sender-receiver” examples. We’ll dive into the protocol’s architecture, explore scalable network topologies, provide production-ready code with advanced error handling, and share hard-earned best practices to ensure your network is stable, secure, and efficient.
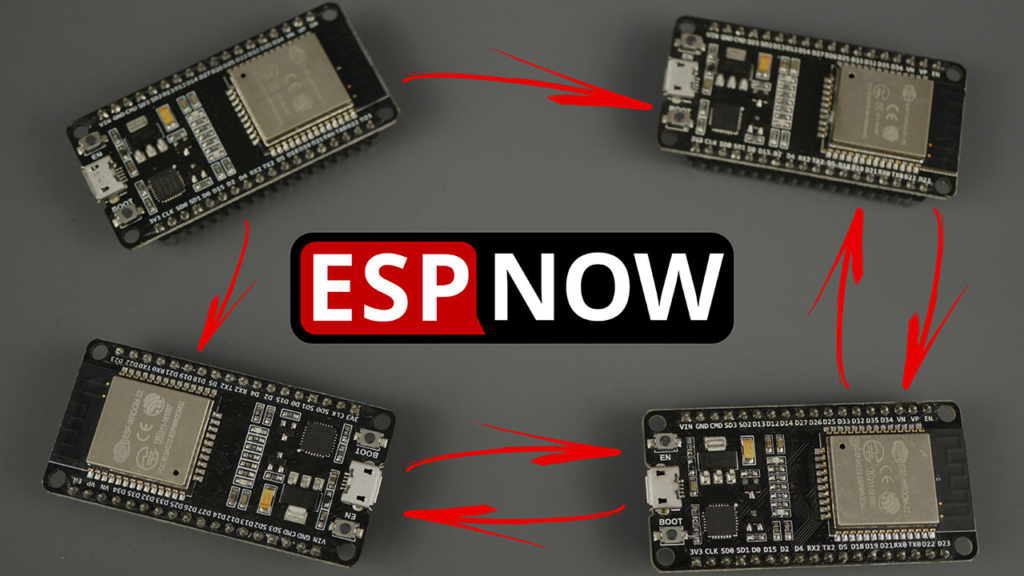
Understanding ESP-NOW: Protocol Deep Dive
ESP-NOW operates on the same 2.4GHz band as Wi-Fi but uses a different packet structure in the data-link layer. Think of it as a walkie-talkie system for your chips: once configured, a board can broadcast data instantly without the handshake overhead of TCP/IP.
Key Characteristics & Advantages:
-
Low Latency: Typical packet delivery occurs in under 10ms, making it suitable for real-time control.
-
Connectionless: No persistent connection is maintained, saving power and processing resources.
-
Peer-to-Peer: Data travels directly between devices, eliminating dependency on a central router.
-
Mixed Security: Supports both encrypted (using SRRC algorithm) and unencrypted communication within the same network.
-
Persistent Pairing: Peer information is stored in non-volatile memory. If a device restarts, it automatically re-establishes communication with its paired peers.
Practical Limitations to Design Around:
-
Payload Size: Limited to 250 bytes per packet. For larger data, you must implement packet fragmentation and reassembly in your application code.
-
Peer Limits: A maximum of 20 total peers, with only 10 encrypted peers in Station mode. Careful network planning is crucial.
-
Range: Similar to standard Wi-Fi, effective range is approximately 100-200 meters line-of-sight, heavily dependent on antenna design and environmental obstacles.
Network Topologies: From Simple to Scalable
ESP-NOW is incredibly flexible. Here are the most effective topologies I’ve used in real projects:
1. One-to-One (Point-to-Point)
The simplest setup. One sender transmits to one specific receiver. Perfect for a remote sensor node sending data to a central display unit.
2. One-to-Many (Broadcast/Star)
A single “master” board sends commands or data to multiple “slave” boards. Crucially, you must add each slave as a separate peer on the master. This is ideal for a centralized light controller managing several ESP32-based light fixtures.
3. Many-to-One (Data Aggregation)
Multiple sensor nodes send readings to a single receiver/gateway, which can then log data or forward it to the cloud via Wi-Fi. This is the classic architecture for environmental monitoring systems.
4. Mesh (Many-to-Many)
Every board is a peer to every other board, creating a resilient network where data can hop between nodes. While ESP-NOW itself isn’t a true mesh protocol, you can build this logic in software. This topology provides redundancy and extends effective range.
Prerequisite: Obtaining the MAC Address
Every ESP-NOW communication requires the 48-bit MAC address of the target receiver. Upload this simple sketch to any ESP32 to find its address:
#include <WiFi.h>
void setup() {
Serial.begin(115200);
WiFi.mode(WIFI_MODE_STA);
Serial.print("ESP32 MAC Address: ");
Serial.println(WiFi.macAddress());
}
void loop() {}
Pro-Tip: Print the MAC address on a label and attach it to your board. In networks with dozens of nodes, this simple step saves countless hours of debugging.
Project: Building a Robust One-Way Communication Link
Let’s build a fault-tolerant sensor data transmitter and receiver. This example sends a structured data packet and includes comprehensive callbacks for monitoring transmission health.
Transmitter (Sender) Code with Enhanced Error Handling
#include <esp_now.h>
#include <WiFi.h>
uint8_t receiverMac[] = {0x30, 0xAE, 0xA4, 0x07, 0x0D, 0x64};
typedef struct sensor_data {
char sensor_id[16];
float temperature;
float humidity;
int battery_mv;
bool alert_status;
} sensor_data_t;
sensor_data_t telemetry;
esp_now_peer_info_t peerInfo;
void OnDataSent(const uint8_t *mac_addr, esp_now_send_status_t status) {
char macStr[18];
snprintf(macStr, sizeof(macStr), "%02X:%02X:%02X:%02X:%02X:%02X",
mac_addr[0], mac_addr[1], mac_addr[2], mac_addr[3], mac_addr[4], mac_addr[5]);
Serial.printf("Packet sent to: %s | Status: %s\n",
macStr,
(status == ESP_NOW_SEND_SUCCESS) ? "SUCCESS" : "FAILED");
if (status != ESP_NOW_SEND_SUCCESS) {
Serial.println("Warning: Transmission failed. Consider implementing retry.");
}
}
void setup() {
Serial.begin(115200);
delay(1000);
WiFi.mode(WIFI_STA);
WiFi.disconnect();
if (esp_now_init() != ESP_OK) {
Serial.println("FATAL: Failed to initialize ESP-NOW");
while (1);
}
esp_now_register_send_cb(OnDataSent);
memcpy(peerInfo.peer_addr, receiverMac, 6);
peerInfo.channel = 0;
peerInfo.encrypt = false;
if (esp_now_add_peer(&peerInfo) != ESP_OK) {
Serial.println("FATAL: Failed to add peer device");
while (1);
}
Serial.println("ESP-NOW Transmitter Initialized.");
}
void loop() {
strncpy(telemetry.sensor_id, "SENSOR_01", sizeof(telemetry.sensor_id));
telemetry.temperature = 23.5 + (random(0, 100) / 100.0);
telemetry.humidity = 65.0 + (random(0, 100) / 100.0);
telemetry.battery_mv = 3800;
telemetry.alert_status = (telemetry.temperature > 25.0) ? true : false;
esp_err_t result = esp_now_send(receiverMac, (uint8_t *) &telemetry, sizeof(telemetry));
if (result != ESP_OK) {
Serial.printf("Send command failed with error: 0x%X\n", result);
}
delay(5000);
}
Receiver Code with Data Processing
#include <esp_now.h>
#include <WiFi.h>
typedef struct sensor_data {
char sensor_id[16];
float temperature;
float humidity;
int battery_mv;
bool alert_status;
} sensor_data_t;
void OnDataRecv(const uint8_t *mac_addr, const uint8_t *incomingData, int len) {
char macStr[18];
sensor_data_t receivedData;
snprintf(macStr, sizeof(macStr), "%02X:%02X:%02X:%02X:%02X:%02X",
mac_addr[0], mac_addr[1], mac_addr[2], mac_addr[3], mac_addr[4], mac_addr[5]);
if (len == sizeof(receivedData)) {
memcpy(&receivedData, incomingData, sizeof(receivedData));
Serial.println("\n=== DATA RECEIVED ===");
Serial.printf("From: %s\n", macStr);
Serial.printf("Sensor ID: %s\n", receivedData.sensor_id);
Serial.printf("Temperature: %.2f °C\n", receivedData.temperature);
Serial.printf("Humidity: %.2f %%\n", receivedData.humidity);
Serial.printf("Battery: %d mV\n", receivedData.battery_mv);
Serial.printf("Alert: %s\n", receivedData.alert_status ? "YES" : "NO");
if(receivedData.alert_status) {
Serial.println("ALERT: High temperature detected!");
}
} else {
Serial.printf("Error: Received packet size (%d) does not match expected size (%d)\n",
len, sizeof(receivedData));
}
}
void setup() {
Serial.begin(115200);
WiFi.mode(WIFI_STA);
WiFi.disconnect();
if (esp_now_init() != ESP_OK) {
Serial.println("FATAL: Failed to initialize ESP-NOW");
while (1);
}
esp_now_register_recv_cb(OnDataRecv);
Serial.println("ESP-NOW Receiver Initialized. Waiting for data...");
}
void loop() {
delay(1000);
}
Advanced Implementation: Two-Way Communication
True peer-to-peer networks require bidirectional data flow. This pattern enables acknowledgment messages, remote configuration, and interactive control.
Key Code Addition for Bidirectional Nodes
Each device must act as both a sender and a receiver:
-
Initialize ESP-NOW as shown.
-
Register both send and receive callbacks.
-
Add the MAC address of every other device it needs to talk to as a peer.
-
In the OnDataRecv callback, you can immediately send a response back using esp_now_send() to the mac_addr provided in the callback.
This creates a responsive dialog between devices, perfect for confirming command receipt or requesting retransmission of lost packets.
Best Practices for Reliable ESP-NOW Networks
-
Channel Management: While channel = 0 enables automatic channel selection, for crowded RF environments, manually set all peers to the same fixed Wi-Fi channel (e.g., peerInfo.channel = 1) to improve stability.
-
Power Supply: Use a stable, low-noise 3.3V power supply. Switching regulators are preferable to linear regulators for powering the radio. Voltage dips during transmission can cause resets.
-
Antenna Considerations: For extended range, use boards with external antenna connectors (like the ESP32-WROOM with u.FL/IPEX) and a proper 2.4GHz antenna. Keep the antenna away from large metal surfaces and other sources of interference.
-
Payload Optimization: With a 250-byte limit, pack your data efficiently. Use appropriate variable types (uint16_t instead of int if values are small) and consider bit fields for multiple boolean flags.
-
Network Diagnostics: Implement a periodic “heartbeat” message in your network. If a node misses several heartbeats, it can be flagged as offline, allowing for graceful system degradation.
-
Encryption for Security: For any project transmitting sensitive data, enable encryption. Set peerInfo.encrypt = true and define a 16-character pmk (primary master key) and lmk (local master key) in the peerInfo struct for both sender and receiver.
Troubleshooting Common ESP-NOW Issues
-
“Failed to add peer”: Double-check the MAC address. Ensure the receiver is powered on and initialized. Try re-adding the peer after a short delay.
-
Inconsistent Delivery: Check power supply stability. Reduce the distance between boards. Change the Wi-Fi channel to avoid interference from local routers.
-
Data Corruption: Always verify data length in the receive callback (len parameter). Add a checksum or CRC field to your data structure for validation.
-
Limited Range: Ensure you’re using boards with a PCB antenna or add an external antenna. Elevate devices and avoid physical obstructions.
Conclusion: Where to Go from Here
You now possess the foundational and advanced knowledge to implement robust ESP-NOW networks. The natural next steps are:
-
Implement Encryption: Secure your communications by adding the pmk and lmk keys.
-
Build a Mesh Network: Write logic for a node to act as a repeater, forwarding messages from nodes that are out of the gateway’s direct range.
-
Integrate with Wi-Fi: Create a hybrid device that uses ESP-NOW to collect sensor data and Wi-Fi to push that data to a web server (MQTT/HTTP).
-
Optimize for Power: Use the ESP32‘s deep sleep mode and have nodes wake up only to send a single ESP-NOW packet, extending battery life to months.
ESP-NOW unlocks a realm of possibilities for decentralized, responsive, and reliable wireless communication between microcontrollers. By applying the structures, error handling, and best practices outlined here, you can move from simple examples to deploying resilient networks for your home, farm, or workshop.
