Want to turn your ESP32 Cheap Yellow Display (CYD) into a portable GPS receiver that shows your exact location, altitude, speed, and precise time—all on a beautiful touchscreen interface? In this project, you’ll learn how to combine the popular NEO-6M GPS module with the CYD and LVGL graphics library to create a self-contained GPS data display perfect for hiking, sailing, car trips, or any outdoor activity where you need location awareness.
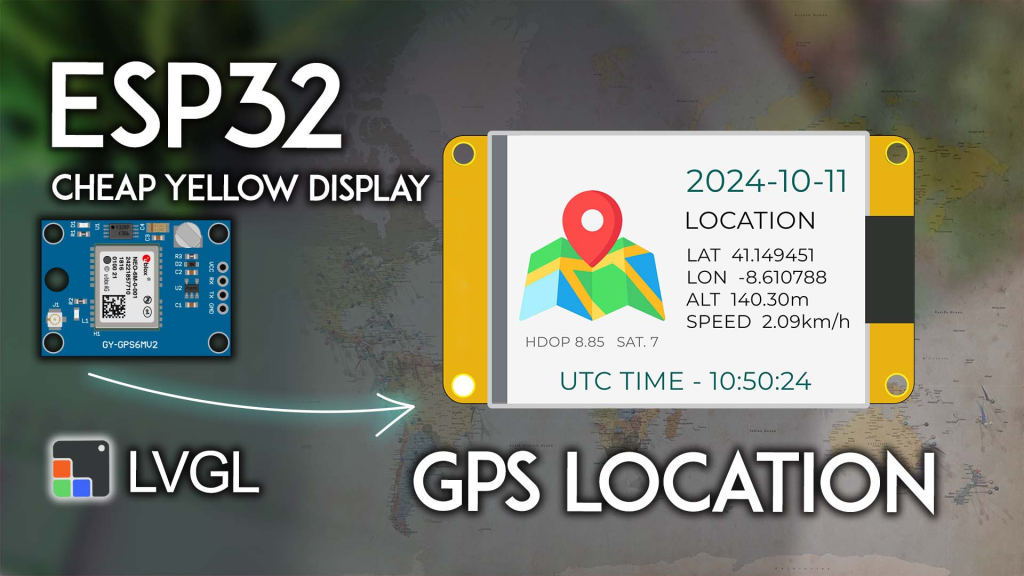
Project Overview: What You’ll Build
This project creates a real-time GPS information dashboard on your ESP32 CYD:
-
Location data: Latitude and longitude with 6-decimal precision
-
Altitude: Current height above sea level in meters
-
Speed: Travel speed in km/h
-
Time & Date: UTC time and current date from GPS satellites
-
Satellite info: Number of satellites in view and HDOP (horizontal dilution of precision)
-
Clean LVGL interface: All data displayed in a well-organized, easy-to-read layout with a custom map icon
The system updates automatically as the GPS module acquires new data, giving you a portable, battery-powered GPS display that costs a fraction of commercial devices.
What You’ll Need: Complete Parts List
👉 Find all components at the best prices here
Wiring the NEO-6M GPS Module to CYD
Connect the GPS module to the CYD‘s CN1 connector (the extended GPIO header) as follows:
Important notes:
-
The GPS module requires a clear view of the sky for first fix—place the antenna near a window or outdoors
-
Some modules include a ceramic patch antenna; others use an external active antenna—both work
-
The CYD‘s 3.3V output can power the GPS module (typical consumption ~45mA)
Prerequisites: Setting Up Your Environment
Complete these essential setup steps before uploading the code:
1. ESP32 Board Support
If not already done, install ESP32 boards in Arduino IDE: Installing ESP32 Board in Arduino IDE.
2. Get Familiar with the CYD
New to the Cheap Yellow Display? Complete our Getting Started with ESP32 CYD guide first. You’ll need to:
3. Install LVGL for CYD
This project uses LVGL 9.x for the graphical interface. Follow our dedicated tutorial:
👉 LVGL with ESP32 Cheap Yellow Display
⚠️ CRITICAL: You must use the exact lv_conf.h file from that tutorial. Other configurations will not work.
4. Install TinyGPSPlus Library
The TinyGPSPlus library parses NMEA sentences from the GPS module:
-
In Arduino IDE: Sketch > Include Library > Manage Libraries
-
Search for “TinyGPSPlus” by Mikal Hart
-
Install version 1.0.3 (recommended for compatibility)
5. (Optional) Understand NEO-6M GPS
If you’re new to GPS modules, let’s learn how GPS works and NMEA sentences.
Creating the Custom Image File
The LVGL interface includes a custom map icon. You need to create an extra file in your sketch folder.
Step 1: Download the Image Header File
⬇️ Download gps_image.h – This file contains the map icon converted to LVGL’s image format.
Step 2: Add to Your Sketch Folder
-
In Arduino IDE, save your main sketch (File > Save As…)
-
Place the downloaded gps_image.h file in the same folder as your .ino file
-
After adding, your Arduino IDE should show two tabs: the main sketch and gps_image.h
Want to learn more? See our guide: ESP32 CYD with LVGL: Display Image on the Screen
Complete Code: GPS Data Display on CYD
Copy the following code into your Arduino IDE. Make sure gps_image.h is in the same folder before compiling.
ESP32 CYD with LVGL - GPS Location, Date, and Time Display
Complete tutorial: https://RandomNerdTutorials.com/esp32-cyd-lvgl-gps-location/
*********/
#include <lvgl.h>
#include <TFT_eSPI.h>
#include <TinyGPS++.h>
#include "gps_image.h"
#define RXD2 22
#define TXD2 27
#define GPS_BAUD 9600
TinyGPSPlus gps;
HardwareSerial gpsSerial(2);
#define SCREEN_WIDTH 240
#define SCREEN_HEIGHT 320
#define DRAW_BUF_SIZE (SCREEN_WIDTH * SCREEN_HEIGHT / 10 * (LV_COLOR_DEPTH / 8))
uint32_t draw_buf[DRAW_BUF_SIZE / 4];
String current_date;
String utc_time;
String latitude;
String longitude;
String altitude;
String speed;
String hdop;
String satellites;
void log_print(lv_log_level_t level, const char * buf) {
LV_UNUSED(level);
Serial.println(buf);
Serial.flush();
}
String format_time(int time_val) {
return (time_val < 10) ? "0" + String(time_val) : String(time_val);
}
static lv_obj_t * label_date;
static lv_obj_t * label_latitude;
static lv_obj_t * label_longitude;
static lv_obj_t * label_altitude;
static lv_obj_t * label_speed;
static lv_obj_t * label_utc_time;
static lv_obj_t * label_hdop_satellites;
static lv_obj_t * label_gps_data;
static void timer_cb(lv_timer_t * timer) {
LV_UNUSED(timer);
lv_label_set_text(label_date, current_date.c_str());
lv_label_set_text(label_hdop_satellites,
String("HDOP " + hdop + " SAT. " + satellites).c_str());
lv_label_set_text(label_gps_data,
String("LAT " + latitude +
"\nLON " + longitude +
"\nALT " + altitude + "m" +
"\nSPEED " + speed + "km/h").c_str());
lv_label_set_text(label_utc_time, String("UTC TIME - " + utc_time).c_str());
}
void create_gui() {
LV_IMAGE_DECLARE(image_gpsmap);
lv_obj_t * img_gpsmap = lv_image_create(lv_screen_active());
lv_obj_align(img_gpsmap, LV_ALIGN_LEFT_MID, 10, -20);
lv_image_set_src(img_gpsmap, &image_gpsmap);
label_hdop_satellites = lv_label_create(lv_screen_active());
lv_label_set_text(label_hdop_satellites, "HDOP -- SAT. --");
lv_obj_align(label_hdop_satellites, LV_ALIGN_BOTTOM_LEFT, 30, -50);
lv_obj_set_style_text_font(label_hdop_satellites, &lv_font_montserrat_12, 0);
lv_obj_set_style_text_color(label_hdop_satellites, lv_palette_main(LV_PALETTE_GREY), 0);
label_date = lv_label_create(lv_screen_active());
lv_label_set_text(label_date, "----/--/--");
lv_obj_align(label_date, LV_ALIGN_CENTER, 60, -80);
lv_obj_set_style_text_font(label_date, &lv_font_montserrat_26, 0);
lv_obj_set_style_text_color(label_date, lv_palette_main(LV_PALETTE_TEAL), 0);
lv_obj_t * heading_location = lv_label_create(lv_screen_active());
lv_label_set_text(heading_location, "LOCATION");
lv_obj_align(heading_location, LV_ALIGN_CENTER, 50, -40);
lv_obj_set_style_text_font(heading_location, &lv_font_montserrat_20, 0);
label_gps_data = lv_label_create(lv_screen_active());
lv_label_set_text(label_gps_data,
"LAT --\nLON --\nALT --m\nSPEED --km/h");
lv_obj_align(label_gps_data, LV_ALIGN_CENTER, 60, 20);
lv_obj_set_style_text_font(label_gps_data, &lv_font_montserrat_14, 0);
label_utc_time = lv_label_create(lv_screen_active());
lv_label_set_text(label_utc_time, "UTC TIME - --:--:--");
lv_obj_align(label_utc_time, LV_ALIGN_BOTTOM_MID, 0, -10);
lv_obj_set_style_text_font(label_utc_time, &lv_font_montserrat_20, 0);
lv_obj_set_style_text_color(label_utc_time, lv_palette_main(LV_PALETTE_TEAL), 0);
lv_timer_t * timer = lv_timer_create(timer_cb, 1, NULL);
lv_timer_ready(timer);
}
void setup() {
Serial.begin(115200);
Serial.println("ESP32 CYD GPS Tracker Starting...");
gpsSerial.begin(GPS_BAUD, SERIAL_8N1, RXD2, TXD2);
Serial.println("GPS Serial initialized at 9600 baud");
lv_init();
lv_log_register_print_cb(log_print);
lv_display_t * disp = lv_tft_espi_create(SCREEN_WIDTH, SCREEN_HEIGHT,
draw_buf, sizeof(draw_buf));
lv_display_set_rotation(disp, LV_DISPLAY_ROTATION_270);
create_gui();
Serial.println("Ready. Waiting for GPS fix...");
}
void loop() {
lv_task_handler();
lv_tick_inc(5);
delay(5);
while (gpsSerial.available() > 0) {
  gps.encode(gpsSerial.read());
}
if (gps.location.isUpdated()) {
latitude = String(gps.location.lat(), 6);
longitude = String(gps.location.lng(), 6);
speed = String(gps.speed.kmph(), 2);
altitude = String(gps.altitude.meters(), 2);
hdop = String(gps.hdop.value() / 100.0, 2);
satellites = String(gps.satellites.value());
current_date = String(gps.date.year()) + "-" +
format_time(gps.date.month()) + "-" +
format_time(gps.date.day());
utc_time = format_time(gps.time.hour()) + ":" +
format_time(gps.time.minute()) + ":" +
format_time(gps.time.second());
Serial.println("--- GPS Update ---");
Serial.print("LAT: "); Serial.println(latitude);
Serial.print("LON: "); Serial.println(longitude);
Serial.print("Speed: "); Serial.print(speed); Serial.println(" km/h");
Serial.print("Altitude: "); Serial.print(altitude); Serial.println(" m");
Serial.print("HDOP: "); Serial.println(hdop);
Serial.print("Satellites: "); Serial.println(satellites);
Serial.print("Date: "); Serial.println(current_date);
Serial.print("UTC Time: "); Serial.println(utc_time);
Serial.println("-----------------");
}
}
How the Code Works
GPS Data Parsing with TinyGPSPlus
The TinyGPSPlus library handles all the complex NMEA sentence parsing. In the main loop, we continuously feed it characters from the GPS module:
while (gpsSerial.available() > 0) {
gps.encode(gpsSerial.read());
}
When the library successfully decodes a location update (gps.location.isUpdated()), we extract all the relevant fields and update our display strings.
LVGL Interface Design
The GUI is built with LVGL’s object-oriented approach:
-
Map icon: Loaded from the custom gps_image.h file
-
Date: Large teal text showing current date
-
Main data block: Multi-line label showing LAT, LON, ALT, SPEED
-
HDOP/Satellites: Small grey text at bottom left
-
UTC Time: Teal text at bottom center
A timer callback (timer_cb) updates all labels with the latest string values every millisecond, ensuring the display stays current.
String Formatting
The format_time() helper ensures time values (hours, minutes, seconds) always display with two digits (e.g., “09” instead of “9”).
Testing Your GPS Display
First Fix (Important!)
GPS modules need time to get a fix, especially indoors:
-
Place the GPS antenna near a window with clear sky view
-
Power the system and wait—first fix can take 30 seconds to 5 minutes
-
Once locked, the display will populate with data
Serial Monitor Output
Open Serial Monitor (115200 baud) to see detailed GPS data as it arrives:
--- GPS Update ---
LAT: 41.387900
LON: 2.169920
Speed: 0.12 km/h
Altitude: 24.50 m
HDOP: 1.20
Satellites: 8
Date: 2024-11-12
UTC Time: 15:23:45
-----------------
Troubleshooting
Taking It Further: Project Enhancements
This foundation opens many possibilities for portable GPS applications:
1. Add Data Logging to SD Card
The CYD has a microSD slot. Log all GPS positions with timestamps for trip tracking.
2. Create a Waypoint Navigator
Add buttons to save current location as a waypoint, then show distance and bearing to that point.
3. Add Compass Display
Integrate a magnetometer (like HMC5883L) to show heading along with GPS data.
4. Make It Battery Powered
Power the CYD and GPS from a USB power bank for true portability.
5. Add Map Display
Use LVGL’s canvas to draw a simple track map based on accumulated GPS points.
Where to Buy Components
Ready to build your own GPS tracker?
👉 Check all components and best prices here
Conclusion
You’ve just built a fully functional GPS data display using the ESP32 Cheap Yellow Display and LVGL. This project demonstrates:
-
GPS integration with the popular NEO-6M module
-
Real-time data parsing using TinyGPSPlus
-
Professional LVGL interface with custom images
-
Portable operation potential for outdoor use
Whether you’re hiking, sailing, or just curious about GPS technology, this device gives you a window into the satellite positioning system that powers modern navigation.
Get your components today and start tracking your position!
Contact Us
