Unlocking the Potential of RFID with Your ESP32: A Comprehensive Tutorial
Radio-Frequency Identification (RFID) technology has moved far beyond retail security tags, becoming a cornerstone for secure access systems, inventory management, smart locks, and interactive projects. At the heart of many DIY and professional applications is the affordable and versatile MFRC522 RFID reader/writer module. When paired with the powerful, Wi-Fi-enabled ESP32 microcontroller, you unlock a world of possibilities for connected, intelligent device identification.
This definitive guide goes beyond basic “hello world” examples. You will gain a deep, practical understanding of how to integrate the MFRC522 with the ESP32 using the Arduino IDE, covering everything from reading a card’s unique ID (UID) to securely writing and reading custom data blocks. We’ll demystify the memory structure of MIFARE Classic 1K tags, provide robust, production-ready code, and share critical best practices to avoid common pitfalls that can render cards unusable. Whether you’re building a door entry system, a tool tracking log, or a personalized smart project, this tutorial provides the expertise and trustworthy foundation you need.
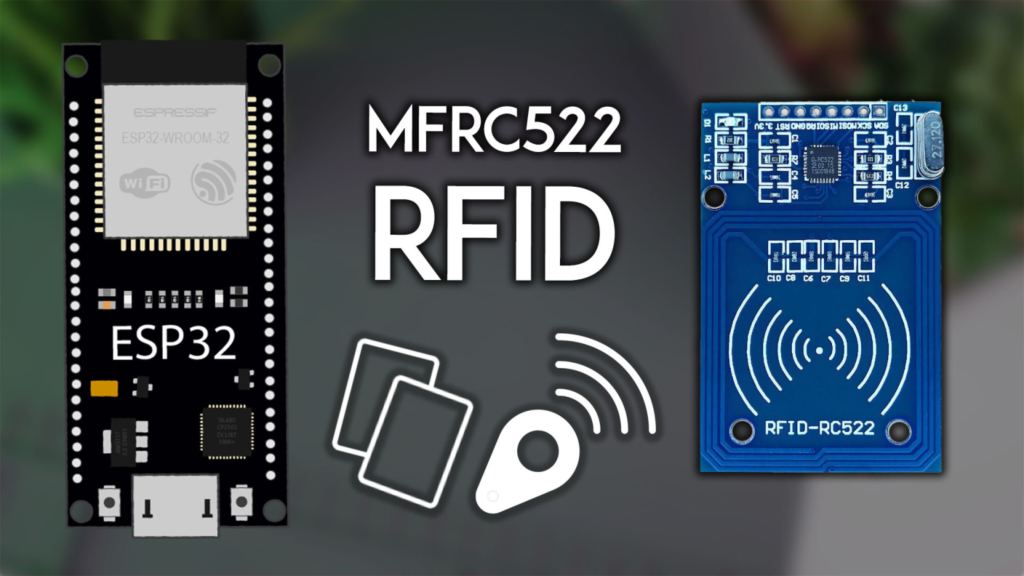
1. Understanding the Hardware: MFRC522 Reader and RFID Tags
Core RFID Concepts
An RFID system consists of two main components:
-
Reader/Writer (PCD – Proximity Coupling Device): The active device that generates a radio frequency field. In our case, this is the MFRC522 module.
-
Tag or Card (PICC – Proximity Integrated Circuit Card): The passive device (like the keychain or card included with the module) that receives energy from the reader’s field and responds with its stored data. Each tag has a globally unique identifier (UID).
Why the MFRC522 and ESP32 Are a Perfect Match
The MFRC522 operates at 3.3V, which aligns perfectly with the ESP32‘s logic level, eliminating the need for voltage shifters. It supports both SPI and I2C communication protocols, offering flexibility in wiring. The ESP32, with its dual-core processor and wireless capabilities, can not only handle the RFID communication but also log access attempts to the cloud, send notifications, or integrate into a larger home automation system.
Memory Structure of MIFARE Classic 1K Tags
A critical part of working with RFID is understanding how data is stored. The common MIFARE Classic 1K tag has a capacity of 1024 bytes (1 KB), organized with a specific and important structure:
⚠️ Important Security & Capacity Note: The net user-accessible storage is 752 bytes. This accounts for the 16 sector trailers (256 bytes) and the read-only manufacturer block (16 bytes). Always authenticate with the correct key before reading from or writing to any sector other than sector 0 (which often uses the default factory key).
2. Hardware Wiring: Connecting MFRC522 to ESP32 via SPI
The Serial Peripheral Interface (SPI) is the most common and performant method for this connection. Use the following wiring table to connect the modules. Double-check connections before powering on to prevent damage.
🔧 Pro Tip: While GPIO 5, 18, 23, and 19 are the default SPI pins (VSPI), the ESP32 is highly flexible. You can define other pins for most SPI signals if your project requires it, but sticking to defaults ensures compatibility with most libraries.
3. Software Setup: Installing the Correct Library
The original MFRC522 library is outdated and can cause issues. For this tutorial, we use the superior Arduino_MFRC522v2 library, which is actively maintained and more reliable.
-
Open your Arduino IDE.
-
Navigate to Sketch > Include Library > Manage Libraries….
-
In the Library Manager, type “MFRC522v2” in the search bar.
-
Find the library named “MFRC522v2” by GithubCommunity and click “Install”.
This library also handles the necessary SPI driver, so no separate installation is needed.
4. Project 1: Reading a Card’s Unique Identifier (UID)
The most basic and common operation is reading a tag’s UID. This is perfect for access control—your system just needs to know which card is present.
The Complete Arduino Sketch
#include <MFRC522v2.h>
#include <MFRC522DriverSPI.h>
#include <MFRC522DriverPinSimple.h>
MFRC522DriverPinSimple ss_pin(5);
MFRC522DriverSPI driver{ss_pin};
MFRC522 mfrc522{driver};
void setup() {
Serial.begin(115200);
while (!Serial);
mfrc522.PCD_Init();
delay(4);
Serial.println(F("ESP32 RFID Reader Ready!"));
Serial.println(F("Scan a PICC (RFID tag)..."));
}
void loop() {
if (!mfrc522.PICC_IsNewCardPresent()) {
return;
}
if (!mfrc522.PICC_ReadCardSerial()) {
return;
}
Serial.print(F("Card UID (HEX): "));
for (byte i = 0; i < mfrc522.uid.size; i++) {
Serial.print(mfrc522.uid.uidByte[i] < 0x10 ? " 0" : " ");
Serial.print(mfrc522.uid.uidByte[i], HEX);
}
Serial.println();
String uidString = "";
for (byte i = 0; i < mfrc522.uid.size; i++) {
if (mfrc522.uid.uidByte[i] < 0x10) {
uidString += "0";
}
uidString += String(mfrc522.uid.uidByte[i], HEX);
if(i < mfrc522.uid.size - 1) uidString += " ";
}
uidString.toUpperCase();
Serial.print(F("Card UID (String): "));
Serial.println(uidString);
mfrc522.PICC_HaltA();
}
How It Works & Testing
-
Upload the code to your ESP32.
-
Open the Serial Monitor (Tools > Serial Monitor) and set the baud rate to 115200.
-
Bring a MIFARE Classic RFID tag close to the antenna of the MFRC522 module.
-
You should see the unique UID printed in two formats: a spaced HEX value and a continuous string. Try multiple cards—each will have a different UID.
This forms the basis of any identification system. You can now modify the code to compare the uidString against a list of authorized UIDs to grant or deny access.
5. Project 2: Writing and Reading Custom Data to a Tag
Moving beyond identification, you can store useful information directly on the card, such as a user’s name, a serial number, or a last-checkout date.
Critical Safety Precautions Before Writing
-
Backup First: If your card has existing data, read and save it before writing anything new.
-
Avoid Sector Trailers: Only write to data blocks. These are Block 0, 1, and 2 in each sector (Block 3 is the sector trailer). We’ll use Sector 1, Block 2 as a safe example.
-
Use Default Keys: New cards have all keys set to 0xFF 0xFF 0xFF 0xFF 0xFF 0xFF (hex). Our code uses this default key for authentication.
The Complete Read/Write Sketch
#include <MFRC522v2.h>
#include <MFRC522DriverSPI.h>
#include <MFRC522DriverPinSimple.h>
MFRC522DriverPinSimple ss_pin(5);
MFRC522DriverSPI driver{ss_pin};
MFRC522 mfrc522{driver};
MFRC522::MIFARE_Key defaultKey;
byte targetSector = 1;
byte targetBlock = 2;
byte absoluteBlockAddr = (targetSector * 4) + targetBlock;
byte dataToWrite[16] = {"Hello, ESP32!"};
byte readBuffer[18];
byte bufferSize = 18;
void setup() {
Serial.begin(115200);
while (!Serial);
mfrc522.PCD_Init();
Serial.println(F("ESP32 RFID Read/Write Example"));
Serial.println(F("** Writes to Block 2 of Sector 1 **"));
for (byte i = 0; i < 6; i++) {
defaultKey.keyByte[i] = 0xFF;
}
}
void loop() {
if (!mfrc522.PICC_IsNewCardPresent() || !mfrc522.PICC_ReadCardSerial()) {
delay(250);
return;
}
Serial.print(F("Card Detected - UID: "));
Serial.println();
MFRC522::StatusCode authStatus = mfrc522.PCD_Authenticate(
MFRC522::PICC_CMD_MF_AUTH_KEY_A,
absoluteBlockAddr,
&defaultKey,
&(mfrc522.uid)
);
if (authStatus != MFRC522::STATUS_OK) {
Serial.print(F("Authentication failed: "));
Serial.println(mfrc522.GetStatusCodeName(authStatus));
mfrc522.PICC_HaltA();
return;
}
Serial.print(F("Writing to Block ")); Serial.print(targetBlock);
Serial.print(F(" of Sector ")); Serial.print(targetSector);
Serial.println(F("..."));
MFRC522::StatusCode writeStatus = mfrc522.MIFARE_Write(absoluteBlockAddr, dataToWrite, 16);
if (writeStatus == MFRC522::STATUS_OK) {
Serial.println(F("Write SUCCESS."));
} else {
Serial.print(F("Write FAILED: "));
Serial.println(mfrc522.GetStatusCodeName(writeStatus));
mfrc522.PICC_HaltA();
return;
}
Serial.println(F("Reading back data for verification..."));
MFRC522::StatusCode readStatus = mfrc522.MIFARE_Read(absoluteBlockAddr, readBuffer, &bufferSize);
if (readStatus == MFRC522::STATUS_OK) {
Serial.print(F("Data in Block ")); Serial.print(targetBlock); Serial.print(F(": "));
for (byte i = 0; i < 16; i++) {
Serial.write(readBuffer[i]);
}
Serial.println();
} else {
Serial.print(F("Reading failed: "));
Serial.println(mfrc522.GetStatusCodeName(readStatus));
}
Serial.println(F("----------------------"));
mfrc522.PICC_HaltA();
mfrc522.PCD_StopCrypto1();
delay(2000);
}
How to Use This Code
-
Upload the sketch.
-
Open the Serial Monitor.
-
Scan a card. The ESP32 will:
-
Authenticate with the sector using the default key.
-
Write the text "Hello, ESP32!" to Block 2 of Sector 1.
-
Immediately read back the data from that block and display it to confirm the write was successful.
-
Scan the same card again. It will now read back the custom data you just stored.
🛠️ Expert Tip: To clear a block, you can write an array of 16 zeros: byte clearData[16] = {0,0,0,0,0,0,0,0,0,0,0,0,0,0,0,0}; and write it to the block using the same MIFARE_Write function.
6. Troubleshooting Common MFRC522 Issues
7. Taking Your Project to the Next Level: Project Ideas
With the fundamentals mastered, integrate your RFID system into larger applications:
-
ESP32 RFID Door Lock: Use a servo or relay to control a lock bolt. Store authorized UIDs in the ESP32‘s non-volatile memory (EEPROM or SPIFFS).
-
Cloud-Based Access Log: When a card is scanned, have the ESP32 connect to Wi-Fi and send the UID and timestamp to a database (Google Sheets, ThingSpeak, or a custom server) via HTTP.
-
Smart Inventory Tool Checkout: Write a tool ID to a tag. When checked out, the ESP32 logs the tool ID, user UID, and time, sending an alert if items are overdue.
-
Interactive Toy/Game: Use different cards as “characters” or “power-ups” in a game, with the ESP32 driving a TFT display for feedback.
By following this guide, you’ve built a strong foundation in practical RFID development with the ESP32. Remember to always handle the sector trailers with care, verify your writes by reading back, and use the robust MFRC522v2 library for the best results. Happy making!
Contact Us
