The DS18B20 digital temperature sensor is a versatile and precise component for your ESP32 projects, offering simplicity through its one-wire communication protocol and the unique ability to network multiple sensors on a single GPIO pin. This comprehensive guide, drawing from extensive hands-on experience in IoT development, will walk you through everything from basic wiring to building a professional web server dashboard. Whether you’re monitoring a single room or creating a multi-point temperature logging system, this tutorial provides the updated code and practical know-how for 2026.
Why the DS18B20 is Ideal for ESP32 Projects
The DS18B20 stands out in the world of microcontroller-compatible sensors. Its one-wire digital interface means you only need one data pin (plus ground) from your ESP32 for communication, drastically simplifying wiring, especially for multiple sensors. Each sensor has a factory-programmed unique 64-bit address, allowing many devices to share the same data bus without conflict. With an operating range from -55°C to +125°C and a typical accuracy of ±0.5°C, it is suitable for applications ranging from environmental monitoring to industrial processes.
Key Technical Specifications
-
Communication Protocol: One-Wire (1-Wire)
-
Power Supply: 3.0V to 5.5V (Compatible with ESP32‘s 3.3V logic)
-
Temperature Range: -55°C to +125°C (-67°F to +257°F)
-
Accuracy: ±0.5°C (from -10°C to +85°C)
-
Conversion Time: Up to 750ms for 12-bit resolution
Hardware Setup: Wiring Your DS18B20 to the ESP32
You can power the DS18B20 in two ways: Normal Mode (recommended for stability) or Parasite Power Mode. The following table outlines the connections for each method using ESP32 GPIO 4 as the data pin.
⚠️ The Pull-up Resistor is Crucial: The 4.7kΩ resistor between the data line and 3.3V is mandatory for stable communication in both configurations. Omitting it is a common reason for sensor read failures.
Software Setup: Installing Required Libraries
Before you can write code, you need to install two essential libraries in your Arduino IDE via Sketch > Include Library > Manage Libraries:
-
OneWire by Paul Stoffregen: Provides the low-level protocol to communicate with one-wire devices.
-
DallasTemperature by Miles Burton: Offers a simplified, high-level API specifically for DS18B20 and similar sensors, built on top of the OneWire library.
After installation, restart the Arduino IDE to complete the process.
Part 1: Reading from a Single DS18B20 Sensor
Let’s start with the foundational code to read temperature from one sensor. This sketch will print readings in both Celsius and Fahrenheit to the Serial Monitor every 5 seconds.
Complete Arduino Sketch
#include <OneWire.h>
#include <DallasTemperature.h>
const int ONE_WIRE_BUS = 4;
OneWire oneWire(ONE_WIRE_BUS);
DallasTemperature sensors(&oneWire);
void setup(void) {
Serial.begin(115200);
sensors.begin();
Serial.println("DS18B20 Temperature Sensor Initialized");
}
void loop(void) {
sensors.requestTemperatures();
float tempC = sensors.getTempCByIndex(0);
float tempF = sensors.getTempFByIndex(0);
if (tempC != DEVICE_DISCONNECTED_C) {
Serial.print("Temperature: ");
Serial.print(tempC);
Serial.print(" °C | ");
Serial.print(tempF);
Serial.println(" °F");
} else {
Serial.println("Error: Could not read temperature data");
}
delay(5000);
}
How the Code Works
-
Library & Pin Definition: The OneWire and DallasTemperature libraries are included. The data pin (GPIO 4) is defined, and library instances are created.
-
Setup Routine: Serial communication starts at 115200 baud for debugging. sensors.begin() initializes the one-wire bus.
-
Reading Temperature: sensors.requestTemperatures() sends a command to all sensors on the bus to perform a temperature conversion. sensors.getTempCByIndex(0) fetches the value from the first (index 0) sensor found.
-
Error Handling: The code checks if the reading equals DEVICE_DISCONNECTED_C (-127°C), which indicates a communication problem, and prints an error message instead.
Part 2: Reading from Multiple DS18B20 Sensors on One Wire
The real power of the DS18B20 shines when you connect multiple sensors. Wire all sensors in parallel: connect all VDD pins to 3.3V, all GND pins to GND, and all DATA pins to GPIO 4 (with a single 4.7kΩ pull-up resistor).
Code for Multiple Sensors
The following sketch automatically discovers all connected sensors, prints their unique addresses, and displays each one’s temperature.
#include <OneWire.h>
#include <DallasTemperature.h>
#define ONE_WIRE_BUS 4
OneWire oneWire(ONE_WIRE_BUS);
DallasTemperature sensors(&oneWire);
int deviceCount = 0;
DeviceAddress tempDeviceAddress;
void setup(void) {
Serial.begin(115200);
sensors.begin();
deviceCount = sensors.getDeviceCount();
Serial.print("Found ");
Serial.print(deviceCount);
Serial.println(" device(s).");
for (int i = 0; i < deviceCount; i++) {
if (sensors.getAddress(tempDeviceAddress, i)) {
Serial.print("Device ");
Serial.print(i);
Serial.print(" Address: ");
printAddress(tempDeviceAddress);
Serial.println();
}
}
}
void loop(void) {
sensors.requestTemperatures();
for (int i = 0; i < deviceCount; i++) {
if (sensors.getAddress(tempDeviceAddress, i)) {
float tempC = sensors.getTempC(tempDeviceAddress);
Serial.print("Device ");
Serial.print(i);
Serial.print(" Temp: ");
Serial.print(tempC);
Serial.println(" °C");
}
}
Serial.println("-----");
delay(10000);
}
void printAddress(DeviceAddress deviceAddress) {
for (uint8_t i = 0; i < 8; i++) {
if (deviceAddress[i] < 16) Serial.print("0");
Serial.print(deviceAddress[i], HEX);
}
}
Part 3: Building an Asynchronous Web Server Dashboard
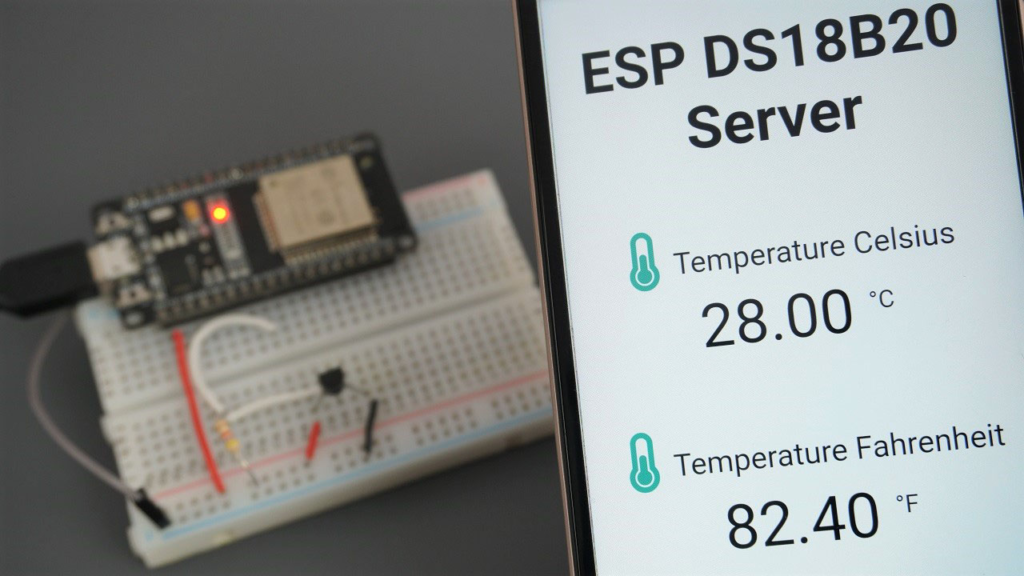
To access your temperature readings from any browser on your local network, you can turn your ESP32 into a web server. We’ll use the efficient ESPAsyncWebServer and AsyncTCP libraries for smooth performance.
Step 1: Install Additional Libraries
In the Library Manager, install:
Step 2: Complete Web Server Code
This code creates a responsive web page that automatically updates the temperature every 10 seconds without requiring a page refresh.
#include <WiFi.h>
#include <ESPAsyncWebServer.h>
#include <OneWire.h>
#include <DallasTemperature.h>
const char* ssid = "YOUR_SSID";
const char* password = "YOUR_PASSWORD";
#define ONE_WIRE_BUS 4
OneWire oneWire(ONE_WIRE_BUS);
DallasTemperature sensors(&oneWire);
AsyncWebServer server(80);
String readTemperature() {
sensors.requestTemperatures();
float tempC = sensors.getTempCByIndex(0);
if (tempC == DEVICE_DISCONNECTED_C) {
return "Sensor Error";
}
return String(tempC);
}
const char index_html[] PROGMEM = R"rawliteral(
<!DOCTYPE HTML><html>
<head>
<meta name="viewport" content="width=device-width, initial-scale=1">
<title>ESP32 Temperature Monitor</title>
<style>
body { font-family: Arial; text-align: center; margin: 50px; }
.reading { font-size: 48px; font-weight: bold; color: #059e8a; }
.unit { font-size: 24px; }
.label { font-size: 20px; color: #555; }
</style>
</head>
<body>
<h1>🌡️ ESP32 Temperature Server</h1>
<div>
<p class="label">Current Temperature</p>
<span class="reading" id="temp">%TEMPERATURE%</span>
<span class="unit">°C</span>
</div>
</body>
<script>
// JavaScript to update temperature every 10 seconds
setInterval(function() {
var xhttp = new XMLHttpRequest();
xhttp.onreadystatechange = function() {
if (this.readyState == 4 && this.status == 200) {
document.getElementById("temp").innerHTML = this.responseText;
}
};
xhttp.open("GET", "/temperature", true);
xhttp.send();
}, 10000);
</script>
</html>)rawliteral";
String processor(const String& var) {
if (var == "TEMPERATURE") {
return readTemperature();
}
return String();
}
void setup() {
Serial.begin(115200);
sensors.begin();
WiFi.begin(ssid, password);
while (WiFi.status() != WL_CONNECTED) {
delay(1000);
Serial.println("Connecting to WiFi...");
}
Serial.print("Server IP Address: ");
Serial.println(WiFi.localIP());
server.on("/", HTTP_GET, [](AsyncWebServerRequest *request) {
request->send_P(200, "text/html", index_html, processor);
});
server.on("/temperature", HTTP_GET, [](AsyncWebServerRequest *request) {
request->send_P(200, "text/plain", readTemperature().c_str());
});
server.begin();
}
void loop() {
}
Troubleshooting Common Issues
If your project isn’t working, consult this table to diagnose and fix common problems:
Project Ideas and Next Steps
With a working temperature monitoring system, you can expand your project:
-
Data Logging: Modify the web server code to save temperature readings with timestamps to a microSD card.
-
Home Automation: Send temperature data to platforms like Home Assistant or Node-RED via MQTT to trigger alerts or control heaters/AC units.
-
Weather Station: Combine the DS18B20 with a humidity sensor (like DHT22) and the web server to create a full-featured local weather station.
This guide provides a robust, tested foundation for integrating the DS18B20 with your ESP32. By following the wiring diagrams, using the updated 2026 code examples, and applying the troubleshooting tips, you’ll be able to implement reliable temperature sensing for any application.
